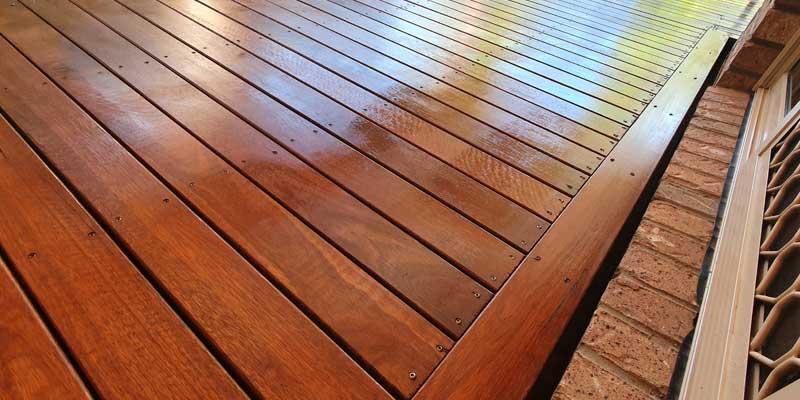
Deck Prep for Staining or Painting: A Local’s Guide

Ask any professional at D&R Painting & Construction, and they will confirm that flawless color begins well before the first brush touches wood. Actual deck prep for staining or painting is a layered process that addresses surface contaminants, moisture levels, and microscopic textures so coatings can bond for years rather than months.

Skimping on these early steps is like polishing a car without washing it first; the gloss looks fine for a moment, but quickly dulls as embedded grit works free. In Marietta’s humid summers and leaf-strewn falls, wood fibers swell, shrink, and host mildew colonies faster than in drier climates, which places extra importance on thoughtful preparation.

Homeowners who invest a weekend in strategic prep often double the life expectancy of their stain or deck floor paint, saving thousands on premature recoats.

Weather, Wood Species, and Foot-Traffic in Marrieta

Georgia’s subtropical environment delivers blazing sunlight, sudden thunderstorms, and high pollen counts that settle into wood pores. High foot traffic from barefoot afternoons, grilling nights, and holiday gatherings rub dirt into the grain, making adhesion harder unless these soils are fully lifted.

Recognizing these regional pressures helps you choose prep chemicals and drying schedules that suit local conditions rather than relying on generic advice from colder zones.

Common Mistakes: Skipping Cleaning, Rushing Dry-Time, and Ignoring Repairs

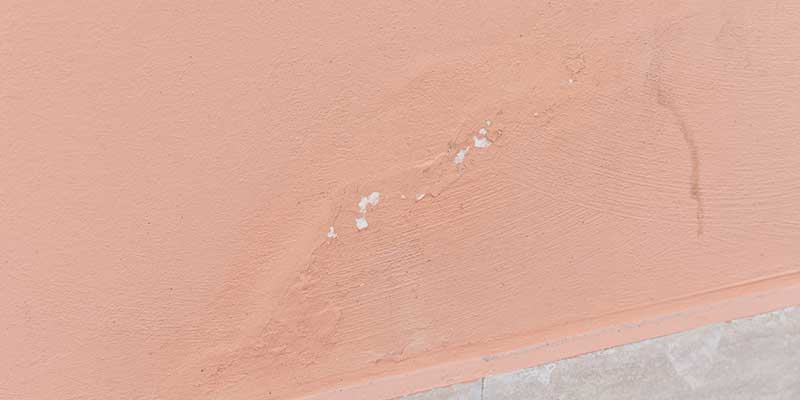
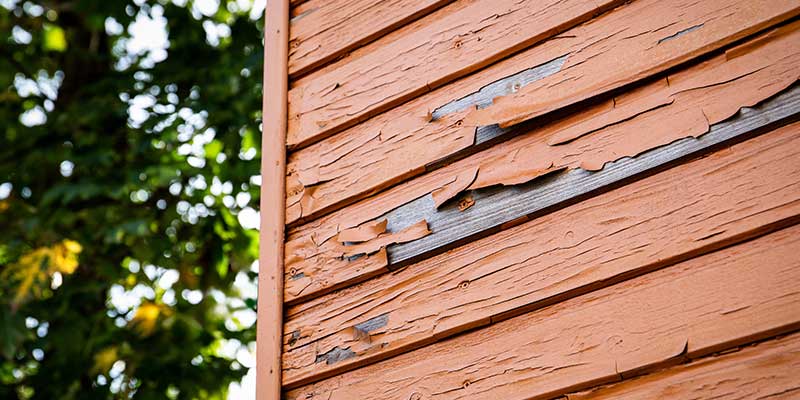
Many homeowners focus on color charts first, then rush to coat damp boards still dotted with algae or hairline cracks. Coating over dirt locks contaminants under the finish, creating weak spots of adhesion that peel within a single season.

Others assume a sunny day is dry enough. Yet, moisture meters frequently show readings above fifteen percent, far too wet for stain penetration, which explains why some fresh projects flake without obvious errors.

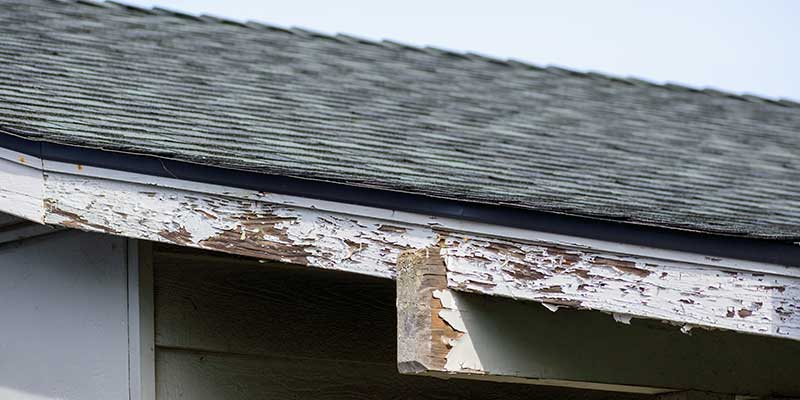
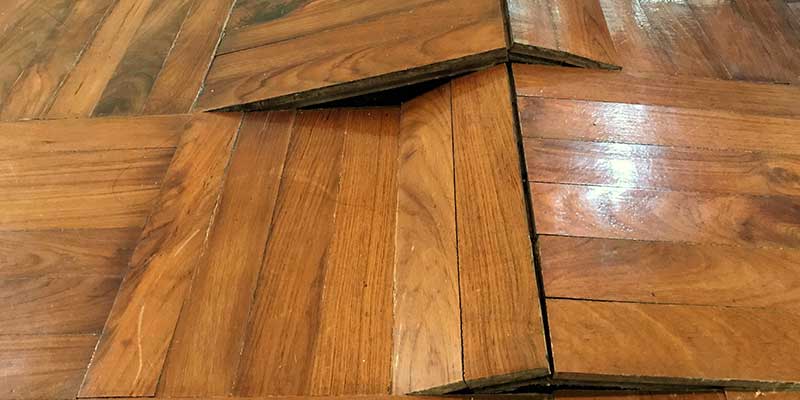
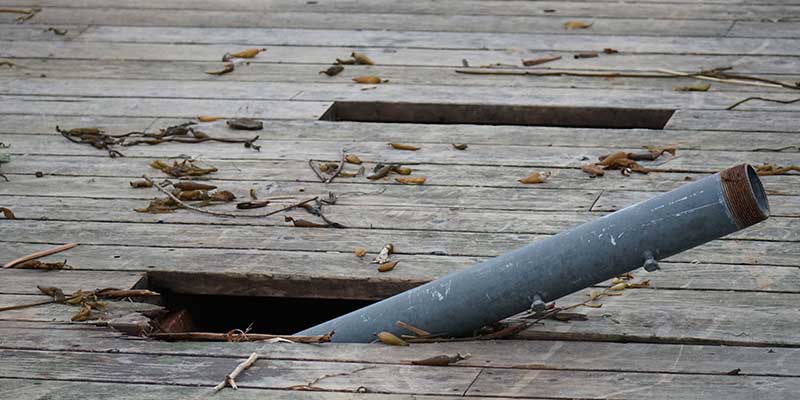
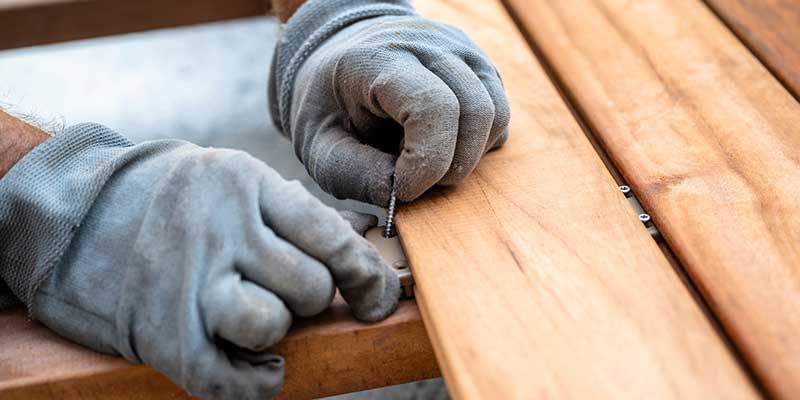
Finally, failing to tighten screws or replace splintered planks invites water intrusion beneath the film, where hidden decay accelerates.

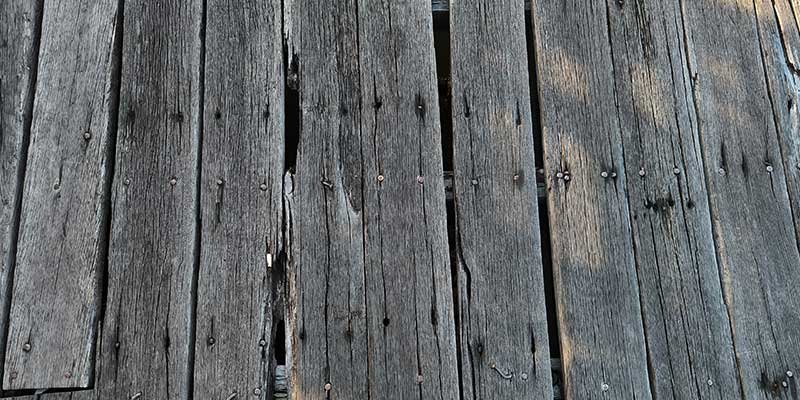
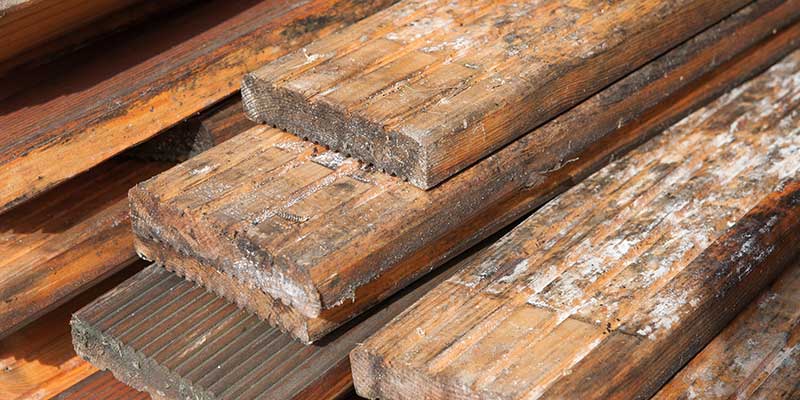
Step 1: Inspect the Deck for Structural and Surface Issues

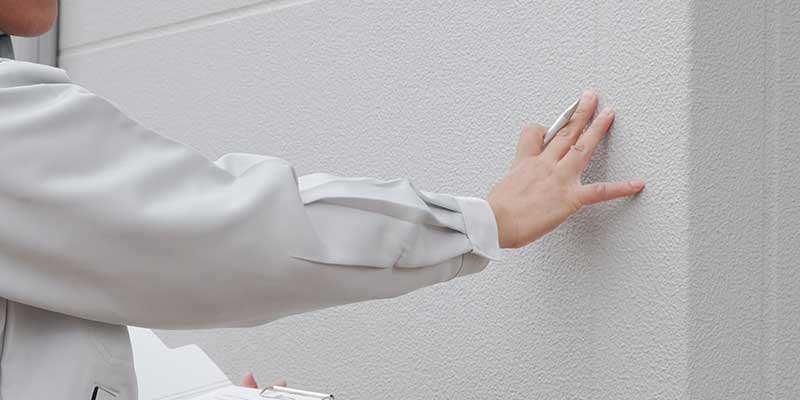
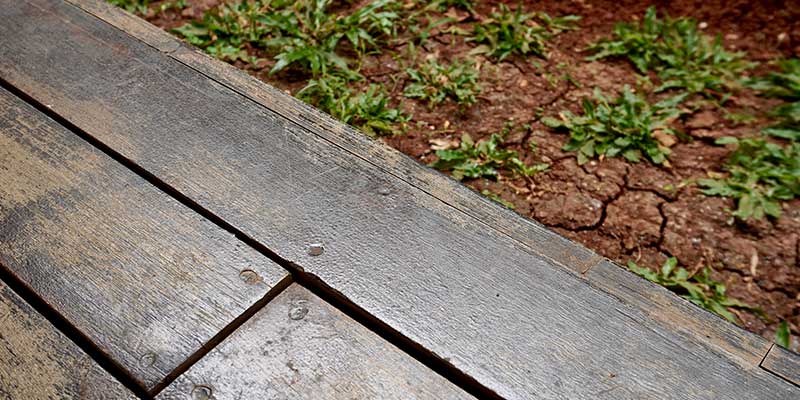
A successful project begins with a systematic walk-through that checks every board, fastener, and support post while daylight reveals flaws many owners overlook. Press a screwdriver into suspect areas along joists and stair stringers; spongy resistance signals decay. Tug each baluster to ensure rail safety. Scan for protruding nails that could catch a sander or foot. Identifying these hazards now prevents wasted labor and ensures coating integrity.

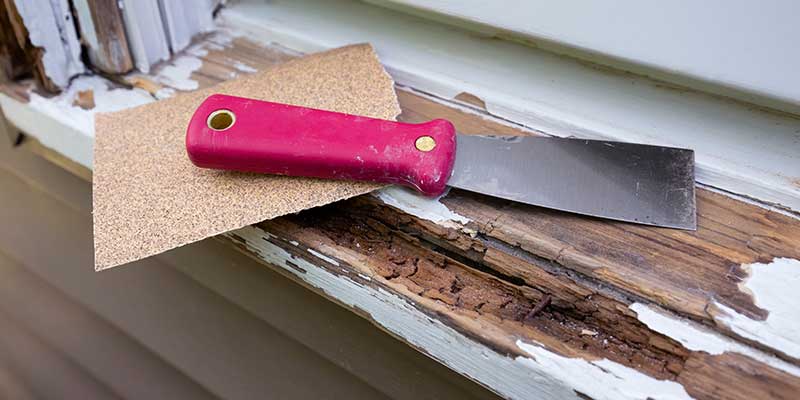
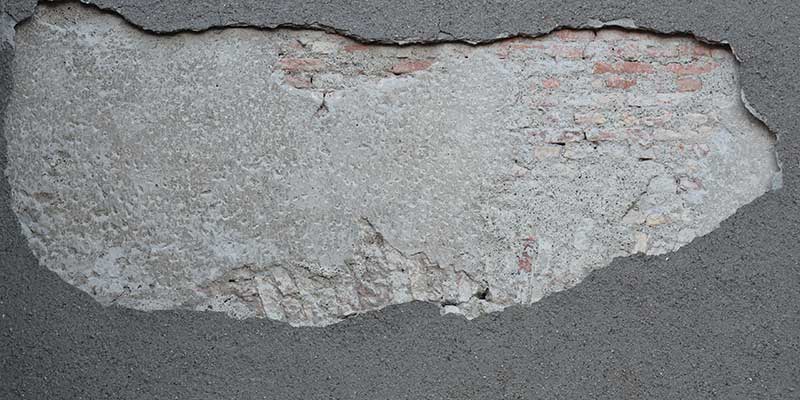
Small splinters shave clean with a sharp chisel, and popped screws tighten easily with corrosion-resistant replacements. But boards with end rot, deep cracks, or black fungal stains require complete replacement so that the stain soaks into healthy fibers rather than dead tissue. Replacing insufficient stock today costs less than stripping and re-staining an entire deck next year when damaged sections fail.

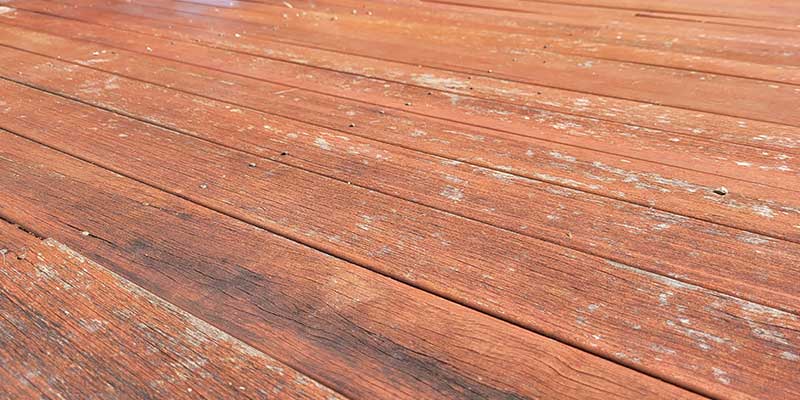
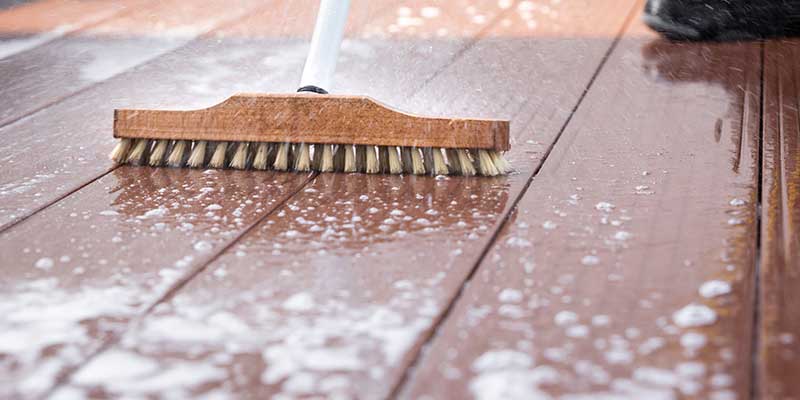
Step 2: Deep-Clean to Remove Dirt, Mildew, and Old Finishes

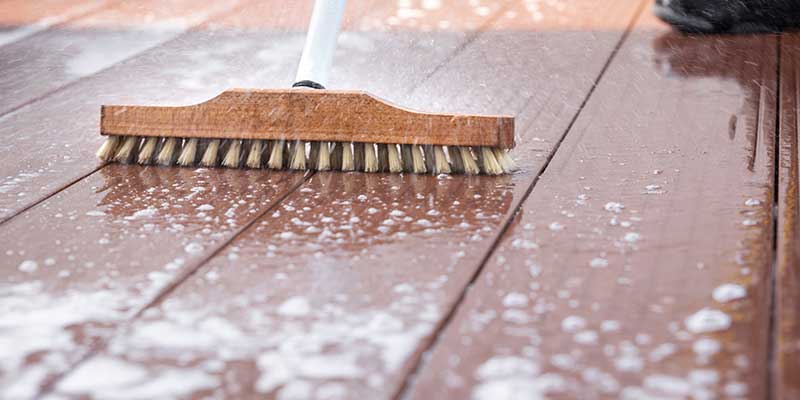
Effective cleaning is the cornerstone of any deck prep for a staining project because wood must be free of oils, pollens, and deteriorating sealers before new coatings can anchor. Oxygen-based cleaners lift organic grime without bleaching color, making them ideal for cedar trim or pine rails.

A follow-up brightener neutralizes pH and restores natural tone, critical for semi-transparent stains that rely on even coloration. If the deck sports an aging solid stain or paint over the deck that shows widespread peeling, a chemical stripper softens the residue so a pressure wash can rinse it away thoroughly. Understanding how to clean decks before staining guides you toward the correct product and prevents harsh chemicals from damaging surrounding landscaping.

Safe PSI Settings and Spray Patterns for Pressure-Washing Without Gouging

Set your washer between five hundred and twelve hundred PSI for softwoods, use a forty-degree fan tip, and keep the wand at least twelve inches from the surface. Work with the grain in smooth, even passes. Higher pressure or narrow turbo nozzles can scar fibers, forcing you to sand deeper later, so patience saves labor.

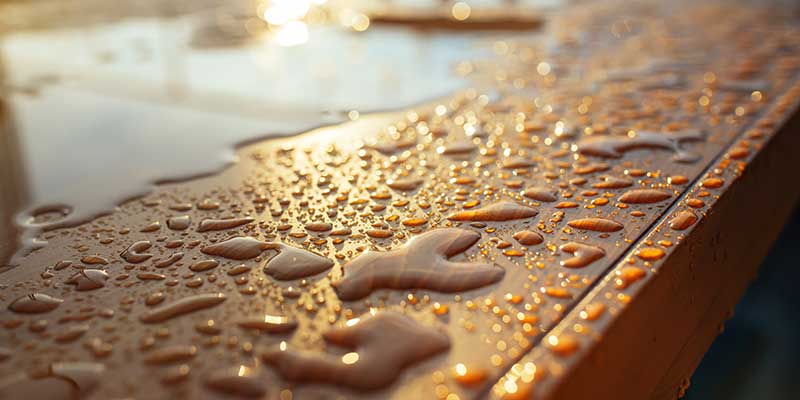
Step 3: Address Moisture and Dry-Time Requirements

Even immaculate boards can reject stain if internal moisture pushes the finish outward during curing. Insert prongs into shaded deck boards and look for readings below fifteen percent. After cleaning, allow at least forty-eight hours of dry weather, more if nighttime dew persists. Moisture meters under thirty dollars guarantee that invisible water won’t sabotage adhesion.

Target daytime highs between fifty and eighty-five degrees with mild humidity. In Marietta’s summer heat, schedule work for early mornings when boards are cool and pores receptive. Avoid coating under direct midday sun; solvent flashes off too quickly, leaving pigments atop the surface rather than in the grain.

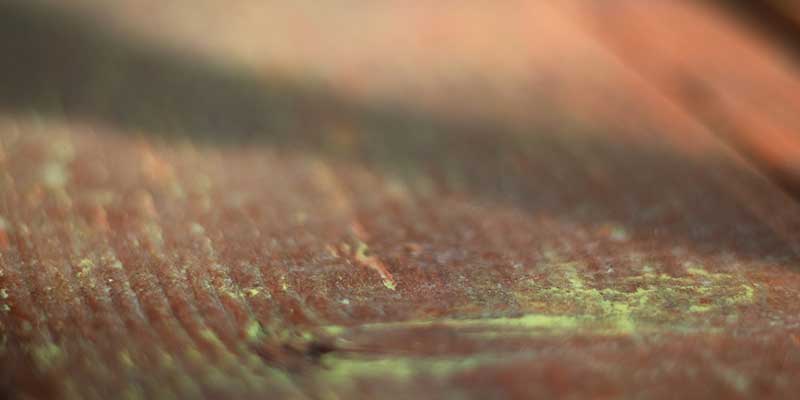
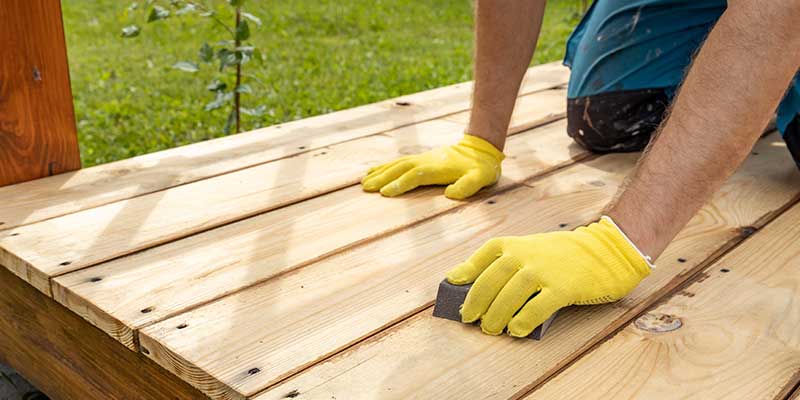
Step 4: Sanding Techniques for Smooth, Absorbent Surfaces

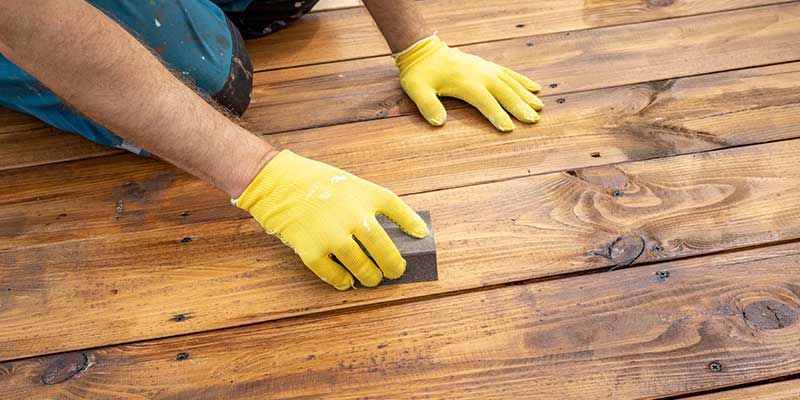
Cleaning raises wood fibers; sanding knocks them flat so stain spreads evenly and paint flows without lap lines. Begin with sixty-grit on floorboards to remove raised grain, then transition to eighty-grit where boards meet to blur potential sander marks. Handrail caps benefit from one-hundred-twenty-grit to prevent splinters on gripping surfaces.

Vacuum thoroughly, then wipe with a slightly damp microfiber cloth. Tack cloths remove the final fine dust that hides in knots.

Step 5: Masking and Protecting Surrounding Areas

Coatings drift farther than you think; preparation protects siding, foliage, and furniture from accidental overspray. Canvas drop cloths shield shrubs while allowing airflow to prevent heat buildup. Pin them tight under the rails so the wind cannot blow them loose. Rest the top edge against house siding to catch drips from over-zealous back-brushing.

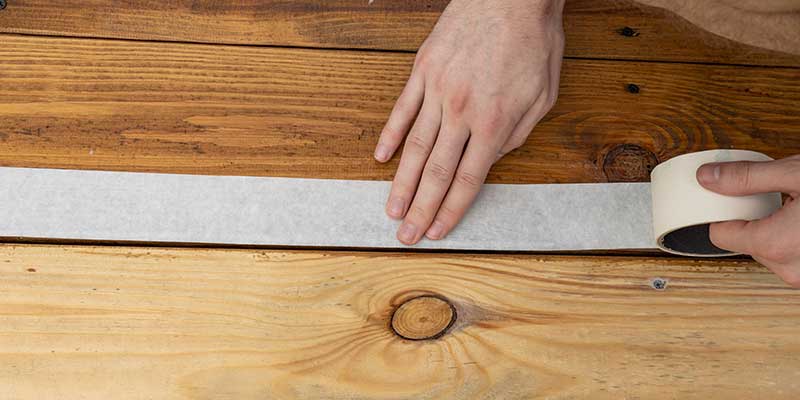
Using Painter’s Tape on Metal Flashing, Light Fixtures, and Hardware

Quality exterior tape withstands UV for several days without leaving adhesive. Seal fixtures and door thresholds where stain would compromise finishes. Removing tape while coatings remain slightly tacky ensures crisp lines without pulling film.

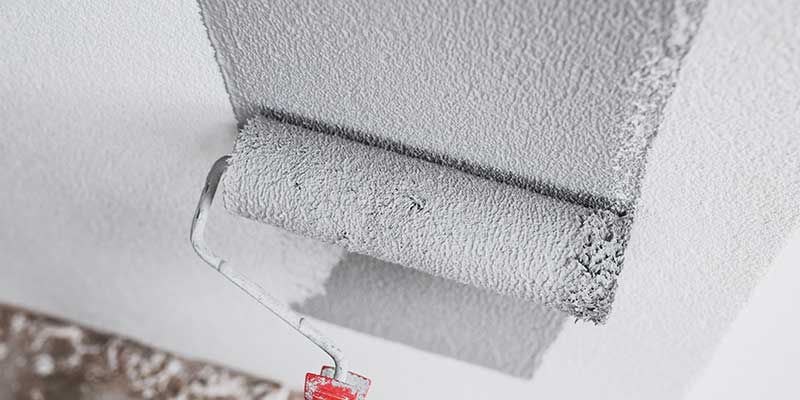
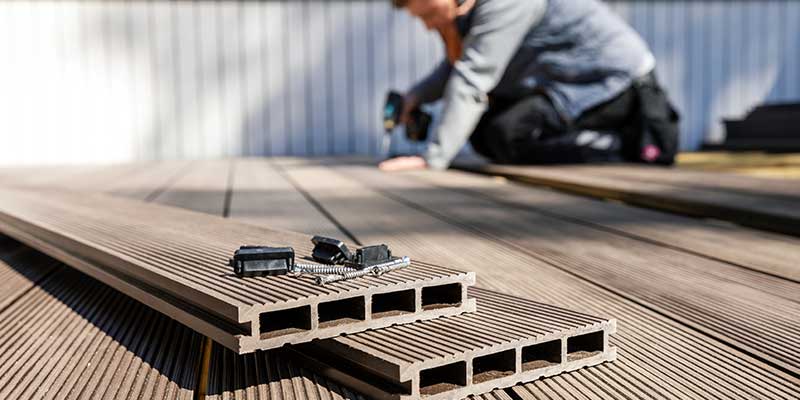
Step 6: Choosing Between Stain and Paint Based on Deck Goals

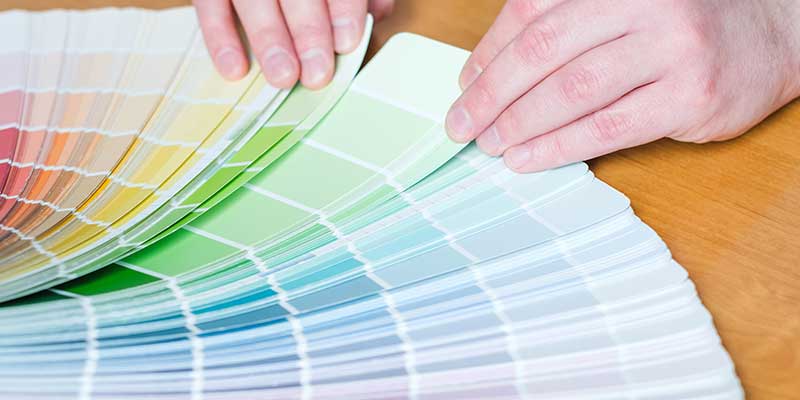
Color preference drives many choices, yet performance profiles differ dramatically between penetrating stains and film-forming paints.

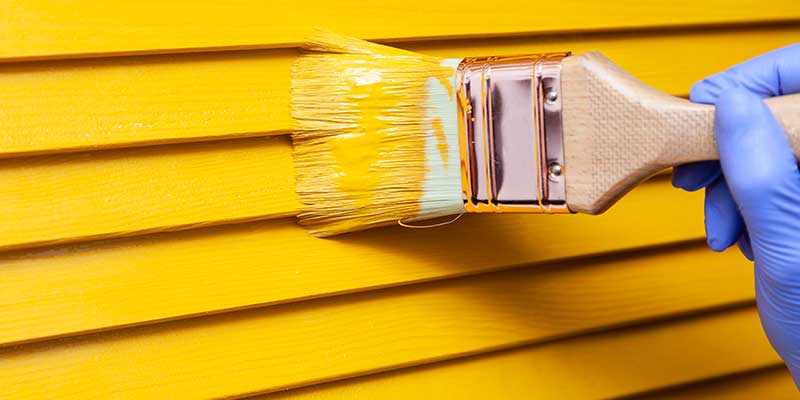
Oil-based stains highlight grain, penetrate deeply, and wear by gradually fading, but solid-color acrylic stains offer bolder hues while still soaking enough to resist peeling. Actual deck floor paint forms a thicker shell that hides grain and excels at covering repaired boards, but it risks flaking if prep is incomplete or moisture rises from beneath.

Deep browns and warm reds resist UV fade better than vibrant blues or greens, regardless of product type. Oil stains on horizontal surfaces may require touch-ups every two to three years; high-build paints can sustain color for five years but demand complete prep when they finally erode.

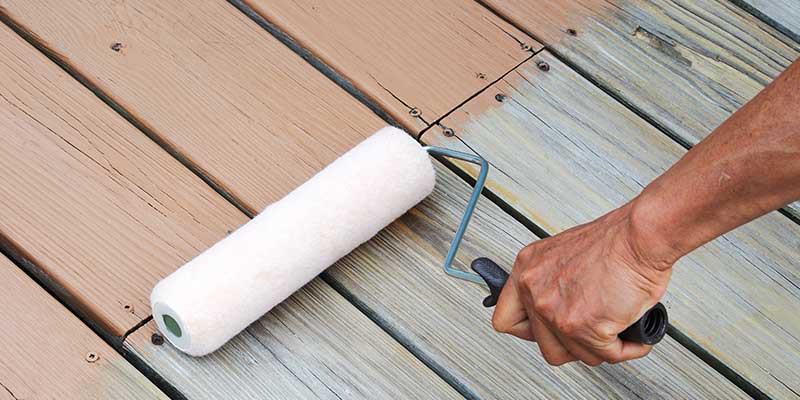
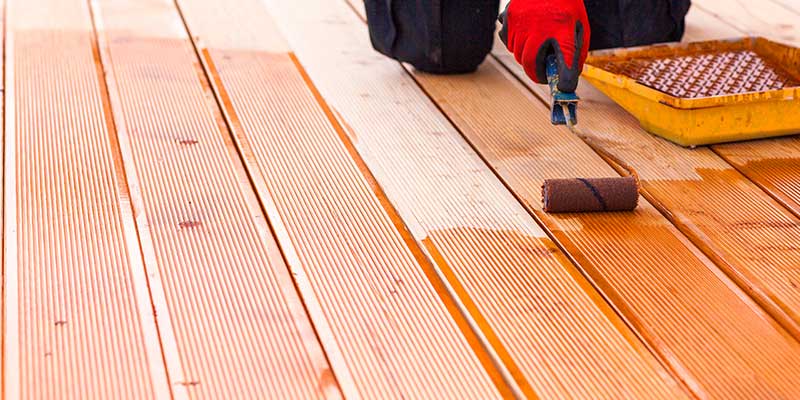
Step 7: Application Best Practices for Lasting Results

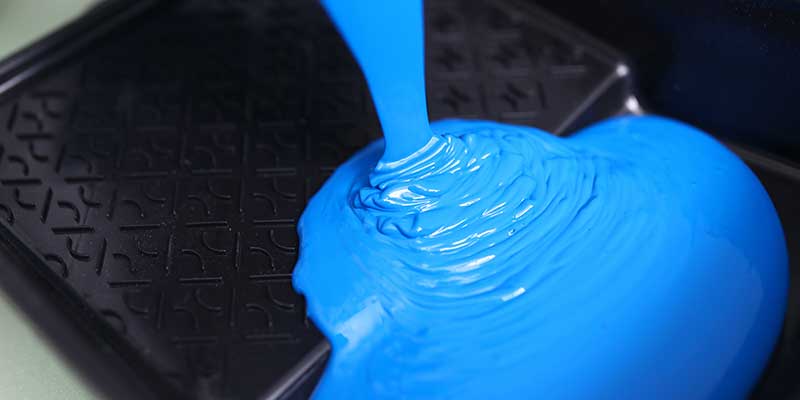
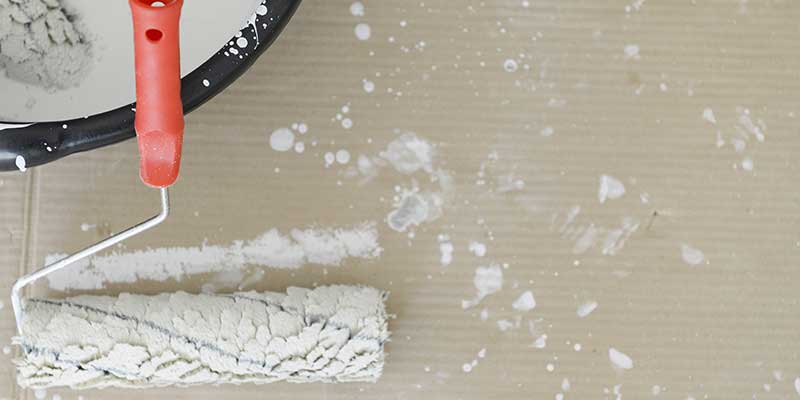
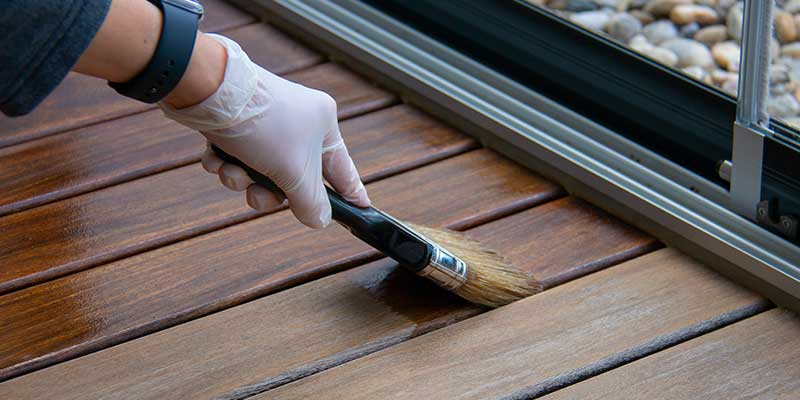
Technique transforms prep work into a showroom finish. Brushes drive stain deep into the end grain, rollers speed application across large surfaces, and airless sprayers coat balusters quickly yet require immediate back-brushing to distribute pigments evenly. Most pros combine these methods: spray or roll broad areas, then brush to work the finish into the pores.

Stain dries fast in Georgia’s heat, so coat three to four boards the full length at a time, then return to smooth overlaps. Back-brushing evens color and prevents lap marks. Avoid heavy build; two light coats outperform one thick layer by curing thoroughly and minimizing film stress.

Maintenance Plan After Staining or Painting

The work isn’t over once brushes are cleaned; routine care prolongs beauty and protection. Rinse pollen every spring and sweep leaves each fall. Spot-treat grease stains near grills before they penetrate. Inspect annually for worn traffic lanes; a quick maintenance coat there can forestall complete deck prep for staining for several years.

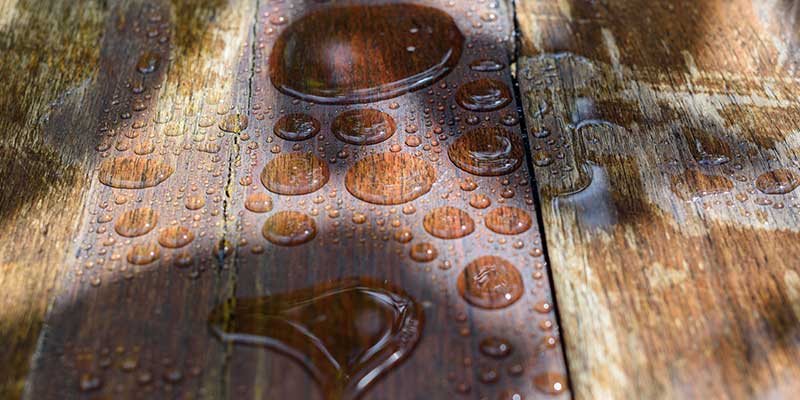
If water no longer beads, pigment looks washed-out, or small flakes appear at board joints, schedule a light clean and single-coat refresh.

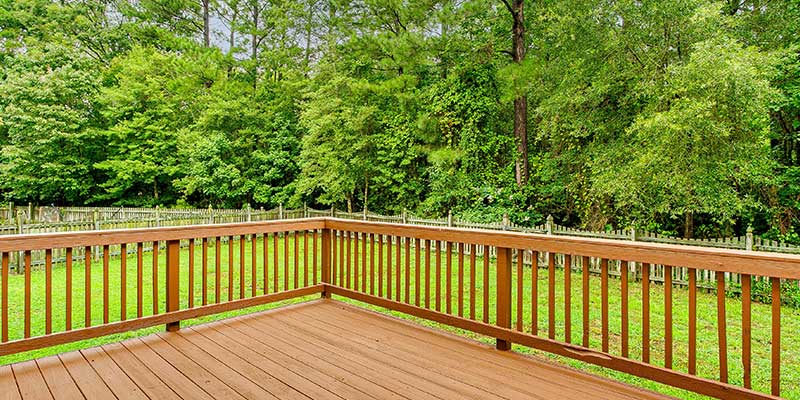
Prep Like a Pro for a Deck That Turns Heads and Lasts

Preparation is the key behind every stunning deck makeover. Whether you crave the natural warmth of stain or plan to paint over deck boards for a modern color splash, disciplined deck prep for staining or painting is crucial.

D&R Painting & Construction brings decades of staining decks tips and regional expertise to every project. From moisture testing to the final brushstroke, our team tailors each step to Georgia’s climate.

Contact us today and let our professionals turn your deck into your desired outdoor centerpiece.

Professional Exterior Paint Job: What to Expect for Marrietas Homes

Marietta’s eclectic mix of Craftsman bungalows, red-brick Colonials, and modern farmhouses shares one common truth: exterior paint is the first thing neighbors and buyers notice and the last defense against Georgia’s punishing humidity and UV-heavy summers.

A professionally executed exterior paint job elevates curb appeal, cuts long-term maintenance, and fortifies siding against wind-driven rain. When done correctly, it boosts property value far beyond the cost of materials and labor.

Curb Appeal, Weather Protection, and Long-Term ROI Explained

Fresh, even color transforms aging facades into eye-catching showpieces, increasing perceived square footage and pride of ownership. More than looks, factory-formulated coatings seal porous clapboards, fiber-cement, and stucco from moisture intrusion that leads to rot or costly siding replacement. Because premium finishes reflect infrared light, they also help regulate attic temperatures, reducing HVAC strain.

Over a ten-year life span, the savings in repairs and energy eclipse the initial investment, proving why homeowners looking for painters should treat exterior work as asset management, not cosmetic luxury.

Key Success Factors: Surface Prep, Product Quality, and Crew Expertise

Longevity starts with meticulous preparation: cleaning, sanding, and priming create an adhesive foundation. Premium paints formulated for southeastern climates resist chalking and color fade. At the same time, experienced crews synchronize weather forecasts, application techniques, and job-site safety to guarantee a result that looks showroom-fresh years down the road.

Phase 1: Initial Consultation and Detailed Estimate

A professional journey starts with an in-person inspection. Painters walk the perimeter, taking moisture meter readings in shaded eaves and sun-blasted walls. They note peeling sections, chalky residue, hairline stucco cracks, and failing caulk around windows. This diagnostic tour defines exactly what must be repaired, primed, or entirely stripped so there are no surprises once scaffolding rises.

A transparent proposal arrives within days, detailing power-washing, carpentry repairs, primers, and finish coats by brand and sheen. The schedule lays out prep days, dry-weather application windows, and projected completion so homeowners can plan landscaping or vacation timing.

Phase 2: Pre-Project Preparation

Color drives emotion and resale value; logistics keep crews productive. Design consultants review neighborhood palettes, plantation shutters, and roof hues to harmonize new tones. They generate software mock-ups so clients envision transformations before gallons are ordered. Where homeowner associations govern exterior changes, painters handle submittals, color chips, and compliance letters to secure approvals quickly.

Georgia’s frequent afternoon thunderstorms can wreak havoc on curing paint. Contractors study seven-day forecasts, prioritize south-facing walls in morning shade, and stagger crew shifts to exploit cooler hours. Homeowners receive guidance on clearing driveways, trimming shrubs for ladder access, and securing pets for safety.

Phase 3: Exterior Surface Preparation

The best way to paint the exterior of a house is to start with pristine surfaces; every subsequent phase builds on this foundation. Technicians wash low-pressure to remove pollen, dirt, and loose paint without forcing water behind boards. Biodegradable mildewcides neutralize algae common on Marietta’s north-facing walls.

High-grade elastomeric caulk bridges trim joints, window casings, and nail holes, flexing through seasonal expansion. Stain-blocking primer seals knots and old water spots, preventing bleed-through into finish coats. Masking film shields windows, stone walkways, and security cameras, guaranteeing crisp lines and zero overspray.

Phase 4: Application Techniques and Best Practices

With substrates prepped, the crew executes the coating plan for your specific siding material. Wood clapboard often benefits from back-brushed handwork that drives paint into the grain, while fiber cement responds well to airless spraying followed by roller layoff for a uniform sheen. Technicians decide wall by wall, matching technique to texture and desired aesthetics.

Pros work systematically from top to bottom, keeping a wet edge so lap marks never form. Manufacturers specify a target mil-thickness; painters use wet-film gauges to confirm coverage rather than relying on guesswork.

Phase 5: Job-Site Management and Daily Clean-Up

Professionalism shows how crews protect landscaping, respect neighbors, and leave the site each evening. Certified painters follow OSHA fall-protection rules, tie off ladders on firm ground, and set up harnesses when tackling dormers. Drip-catching buckets hang from belts, and drop cloths stay clean by midday shake-outs, ensuring no mulch beds collect flakes.

Before departing, teams store brushes, consolidate materials, and remove loose debris. Inviting homeowners to review progress, address questions, and preview next-day goals, fostering transparency and satisfaction.

Phase 6: Quality Assurance and Final Inspection

Brands like Sherwin-Williams and Benjamin Moore back their premium lines only if applied within specifications. Painters inspect surfaces at dawn and dusk, when angled light reveals holidays, thin or missed spots. They correct edges, fill pinholes, and verify color consistency across siding, trim, and doors.

Once all touch-ups dry, contractors guide clients around the home, explaining maintenance tips and warranty coverage.

Timeline and Cost Expectations

Understanding scheduling realities prevents frustration. A three-thousand-square-foot Colonial with moderate peeling typically spans six to eight working days, barring rain delays. Severe carpentry repairs or intricate millwork extend timelines, while cool, dry weeks shorten cure intervals.

Budget Drivers: Paint Grade, Trim Detail, and Access Challenges

Premium elastomeric coatings cost more per gallon but stretch and contract better with Georgia’s humidity swings, extending life expectancy. Intricate crown molding, multiple color schematics, or hard-to-reach gables add labor hours. Boom-lift rentals elevate costs on steep lots, but ensure safety and quality.

Warranty, Maintenance, and After-Care

A professional exterior paint job is the first chapter, not the epilogue. D&R Painting & Construction offers multi-year warranties covering peeling or blistering due to application error, while manufacturers protect against premature color fade or film failure. Documenting the job ensures smooth claims if unlikely issues arise.

Annual Wash-Downs, Touch-Up Schedules, and Color Fade Monitoring

Gentle garden-hose rinses each spring remove pollen that feeds mildew. Spot-touch scrapes early to prevent water infiltration under paint film. Knowing how long does it take to paint a house exterior equips homeowners to schedule full repaints before deterioration accelerates.

Choosing the Right Painting Contractor

The most vibrant pigment cannot compensate for poor quality. Georgia requires contractors to hold business licenses and carry general liability plus workers’ compensation. Ask for certificates and verify coverage directly with insurers.

Side-by-side proposals should outline prep steps, number of coats, specific brands, sheen levels, and cleanup promises. A low bid that omits priming or uses bargain paint hides real costs down the road.

Transform Your Home With Confidence

A professional exterior paint job orchestrates dozens of micro-steps, including inspection, preparation, application, and review, into one cohesive performance that elevates Marietta homes against sun, storms, and time.

The process begins with a thorough estimate, continues through strategic scheduling, meticulous surface restoration, expert application, and ends with documented warranties and homeowner education.

Ready to experience the D&R Painting & Construction difference? Reach out for a complimentary evaluation and discover that only seasoned professionals deliver the exterior home painting tips. Our team will explain every detail, from selecting hues accentuating your architecture to calculating how long it takes to paint house exterior surfaces without rushing cure times.

Contact us now and watch your curb appeal soar under the care of Marietta’s trusted painting craftsmen.

How Often Should You Paint Your House Exterior?

A fresh, durable paint job protects your home from sun, rain, and daily wear while boosting curb appeal. If you’ve wondered, “How often should you paint your house exterior?” The short answer is that timing depends on climate, materials, prep quality, and maintenance.

The longer answer below gives you a clear, practical timetable, plus pro guidance from D&R Painting and Construction, to help you confidently plan the next project and maximize every dollar you invest in painting the house exterior.

What Determines Exterior Repaint Frequency?

Climate & Sun Exposure

Sun-baked south and west walls degrade fastest because UV breaks down resins and pigments, leading to chalking and fading. Heat, humidity, heavy rain, and occasional freeze–thaw cycles stress paint films, so these elevations often need attention a year or two earlier than shaded sides.

Siding Material & Condition

Different substrates move and absorb moisture at different rates. Porous wood and stucco need more frequent repaints than fiber-cement or masonry, while older, cracked, or previously neglected surfaces shorten cycles by exposing paint to moisture and movement.

Previous Paint System

A high-adhesion primer, sufficient film build, and thorough hand prep dramatically extend service life. Weak washing, skipped sanding, thin coats, and brittle caulk shorten the clock, making the next repaint necessary earlier than expected.

Color & Sheen Choices

Darker colors absorb more heat and can fade faster, especially on southwest exposures. Higher sheens shed dirt and moisture better, but highlight surface imperfections; choosing balanced light reflectance values helps manage durability and appearance.

Surroundings & Maintenance

A spring wash, strategic recaulking, and selective touch-ups on the harshest faces can push a repaint out by years. This small routine is one of the most cost-effective steps to paint exterior house with longevity in mind.

Recommended Repaint by Materials

Wood Siding & Trim

3 to 7 years paint; 2 to 4 years solid stain; shorter in high-sun or coastal zones:

Wood expands and contracts with moisture and temperature, so coatings flex constantly. Expect repainting on a 3–7-year cycle for paint and 2–4 years for solid stain, with the lower end in high-UV or salty environments.

Fiber-Cement

7 to 12 years with premium acrylic and proper primer:

Dimensionally stable and less porous, fiber-cement holds paint well when primed correctly and coated with 100% acrylic. With quality prep and products, many homes enjoy a decade or more between repaints.

Stucco

5 to 10 years:

Stucco breathes and can develop hairline cracking. Breathable acrylics or elastomeric bridge micro-cracks resist wind-driven rain and, when properly applied, usually deliver mid- to upper-range service life.

Brick & Masonry

10 to 15 years for painted brick; breathable coatings and efflorescence control:

Painted brick and block can last longer if moisture and salts are managed. Breathable coatings and efflorescence treatment help prevent blistering and keep cycles closer to the 10–15 year range.

Aluminum & Vinyl

7 to 10 years; verify paintable vinyl color shift limits to avoid warping:

Sound aluminum takes paint predictably; vinyl requires careful color selection to avoid excess heat gain. With compatible primers and lighter, approved colors, these substrates often reach the upper end of the range.

Signs It’s Time to Repaint Your Home

Fading, Chalking, and Color Mismatch: When the color looks washed out and a white residue rubs off on your hand, UV has weakened the film. Patchy touch-ups that won’t blend signal that the overall system is aging and due for a reset.

Peeling, Cracking & Alligatoring: Edge lifting at boards and trim reveals adhesion loss from trapped moisture or poor bonding.

Failed Caulk & Hairline Cracks: Open joints and pulled caulk around windows and trim invite water intrusion and energy loss. Replacing failed sealant early stabilizes the paint film and can delay a full repaint.

Mildew, Rust & Stains: Persistent staining or growth that returns quickly after cleaning indicates coatings are losing protection. Addressing the source and recoating with the right primers and topcoats restores resistance.

How to Extend the Life of Your House Exterior Paint Job

Exterior Painting Services

Durability begins with substrate health. A low-pressure wash, meticulous scraping, feather-sanding to solid edges, spot-priming bare wood, and timely carpentry repairs create a foundation that makes every coat last longer.

Pair substrates with proven systems: bonding primers on glossy or chalk-prone areas, 100% acrylic topcoats for UV and flexibility, and elastomerics to bridge stucco hairlines. Sticking with compatible manufacturer systems reduces failure points.

A spring wash, strategic recaulking, and selective touch-ups on the harshest faces can push a repaint out by years. This small routine is one of the most cost-effective steps to paint an exterior house with longevity in mind.

Color Strategy for Longevity: How it Works

1. Light vs. Dark Exterior Colors

Lighter colors reflect heat and tend to fade more gracefully. Choosing hues with higher light reflectance values reduces thermal stress, especially on vinyl or sun-drenched elevations.

2. Accent Exterior Colors & Trim

Semi-gloss and gloss on trim and doors enhance cleanability and shed water. UV-stable, high-quality pigments hold color longer on bold entries and shutters.

Quick Decision Framework: “Do I Paint This Year?”

A quick walk-around tells the story. If you find more than one red flag, visible chalking, lifted edges, hardened or cracked caulk, or uniform fading, it’s time to plan estimates and schedule work.

Record the last project date, substrate, products used, and sun/wind exposure notes. That log helps answer how often should you paint your house exterior next time and keeps maintenance proactive rather than reactive.

Protect Your Curb Appeal and Structure

With the right products, weather window, and prep, you don’t need to question how often should you paint your house exterior, especially when maintaining caulk and washing annually. If your home requires a more professional approach, call D&R Painting and Construction to inspect, recommend the best time to paint exterior of your  house, and map out the precise steps to paint the exterior for maximum durability.

Reach out today to schedule a free, no-pressure consultation and get a written estimate tailored to your materials, exposure, and budget. Your next paint job should be the longest-lasting one yet, and our team is ready to make it happen.

Best Tips for Protecting Your Deck from Georgia’s Weather

Georgia’s deck weather is a rollercoaster, soaking humidity, pop-up thunderstorms, blazing UV, pollen waves, occasional freezes, and coastal salt air compete to beat up your boards and finishes.

Protecting your deck from Georgia’s weather here means building smart, finishing correctly, and following a maintenance rhythm tailored to local conditions. As a Georgia-focused painting and staining partner, D&R Painting and Construction helps homeowners turn that challenge into a simple plan for protecting their deck with results that look great and last.

How Georgia’s Climate Wears Down Decks

Humidity & Frequent Rain

Moist air and frequent showers push moisture into wood fibers, swelling boards and feeding mildew. Wet cycles followed by hot sun expand and contract the surface repeatedly, stressing fasteners and thin finishes.

Effects: When boards absorb water unevenly, they cup and crown, creating trip points and puddles. Persistent dampness supports decay fungi, especially at end grain and hidden hardware. Galvanized fasteners can corrode faster in damp, acidic debris, loosening the connection between boards and framing.

UV & Heat

Summer heat bakes horizontal surfaces, and intense UV breaks down lignin in wood, leading to color fade and hairline checking. Darker colors run hotter and dry out faster.

Effects: As UV attacks exposed cells, you’ll see graying, lifted fibers, and a rougher feel underfoot. The finish thins and loses water repellence, so rainfall penetrates faster and evaporates slower, compounding wear.

Pollen, Leaves & Red Clay

Spring pollen mixes with Georgia rain to form a slick film that traps moisture on the surface. Decaying leaves add tannins and organic acids; red clay can stain and grind into soft wood fibers. If left alone, that film becomes the starter culture for mildew.

Effects: Stubborn yellow-green pollen bands and rusty clay streaks reduce curb appeal and accelerate finish failure.

Coastal Salt Air

Salt-laden breezes and intense sun punish both coatings and hardware. Chlorides attract moisture and speed corrosion, while UV and heat increase finish wear.

Effects: Budget fasteners fail early near the coast, and thin, film-forming coatings peel quickly in salty, humid air.

Materials That Stand Up in Georgia

Lumber & Composites

Thanks to affordability and availability, pressure-treated southern yellow pine remains common for structure and decking. Cedar and ipe offer better natural resistance to decay and movement; they cost more but can outlast softwoods with proper care. Composites and capped polymers resist rot and staining but still demand routine cleaning, careful installation, and occasional color refresh to keep heat and UV in check.

Hardware & Fasteners

The wrong fasteners are often the first failure. Moisture, tannins, and coastal salt all test metal durability. Matching hardware to location is a cornerstone of protecting your deck from the weather in Georgia.

Inland, hot-dipped galvanized fasteners and connectors perform well when paired with compatible treated lumber.

Finishes & Stains

Penetrating, oil-modified, and waterborne stains with robust UV packages give the best balance of breathability, color retention, and water repellence. The goal is to slow liquid water while allowing vapor to escape, avoiding the peel cycles common to films.

Semi-transparent finishes showcase grain, block UV, and are easier to refresh than paints or thick films. Penetration ensures the coating moves with the wood, reducing cracking and peeling.

Moisture Control & Drainage Details

Small construction details have an outsized impact in Georgia’s wet-dry cycles. Thoughtful spacing and sealing prevent water traps that attack from the inside out.

Consistent gaps promote airflow and drainage so boards dry quickly, sealing end grain curbs absorption where wood absorbs the most. Joist and beam tape shed standing water from horizontal framing and extend the life of the substructure. Reliable ledger flashing with kick-out prevents water from sneaking behind the connection to the house.

Grade & Landscaping

The ground beneath and around your deck can be a hidden source of moisture. Managing the grade and vegetation keeps the area drier and healthier. Adequate clearance allows airflow so the underside dries after storms. Grading the soil to move water away prevents splashback and damp microclimates. Planters should never sit directly on the deck; use risers or saucers to stop trapped moisture from etching finish circles and feeding mildew.

UV & Heat Protection

Finishes are not a one-time event in Georgia. Sun and rain steadily consume protectants, so a maintenance rhythm preserves beauty and structure. A gentle clean removes dirt and organics; a brightener resets pH and opens pores for optimal adhesion; a quality stain restores water repellence and UV shielding.

Most decks need this cycle every one to two years, with high-sun locations potentially requiring touch-ups sooner based on the weather for staining a deck finished and recent exposure.

Shade Solutions

Strategic shade reduces surface temperature, color fade, and drying stress. It also makes the space more comfortable in midsummer. Built shade softens UV intensity without trapping moisture against the boards. Use breathable outdoor rugs without rubber backings, which can imprint patterns and trap heat, accelerating finish failure.

Mold, Mildew & Pollen Control

Regular light maintenance keeps surface films from taking hold. Gentle methods respect the wood and the stain. A low-pressure rinse removes loose debris without raising grain. Oxygenated cleaners lift pollen, mildew, and clay without bleaching fibers, and a soft brush preserves the surface so your stain protects your deck from weather between recoats.

Airflow & Sunlight

Mildew thrives in shade and stagnation. Opening the space improves dry times and discourages growth. Keep shrubs cut back from rails and skirts to move air freely. If feasible, use lattice designs or vented skirting so that damp air under the deck can escape after storms.

Storm & Hurricane-Season Prep

Before a Storm

Preparation reduces projectile risk and water intrusion. A quick check of critical connections goes a long way. Stow or tie down loose items that can scrape finishes or strike railings. Confirm that the rails are rigid and the ledger bolts are snug; loose fasteners can fail when winds flex the structure.

After a Storm

Prompt cleanup prevents long-term staining and rot. It also gives you a chance to catch early issues. Remove branches and leaf mats quickly so the surface can dry. Look for lifted boards, proud screws, and scuffed finish; addressing small failures right away helps the rest of the coating remain intact.

Pest Protection

Moisture control is pest control. Dry structures are less inviting to wood-destroying insects. Avoid piling mulch against posts or skirts. Periodically check the ledger and post bases for tunnels or frass. Where risk is high, coordinate with a pest professional for barrier systems that complement our protective staining plan.

Bees and Wasps target exposed, unfinished wood and corners. Finishing and monitoring are your best defenses. Seal existing holes and finish vulnerable undersides so bees are less attracted to the nest. Traps and seasonal monitoring reduce pressure before it becomes a cosmetic or structural concern.

Common Mistakes to Avoid

  • Power-washing at high PSI: Excessive pressure feels effective, but tears fibers and invites premature failure of the next finish coat. With the right tip, detergents, and technique, keep pressure conservative. Clean deeply without shredding the surface that your stain needs to protect.
  • Film-forming paints on horizontal boards: Paint-like films trap water and peel in Georgia’s humidity cycle, especially on board tops and end grain. When moisture vapor can’t escape, blisters and flakes follow. Penetrating stains breathe with the wood, making them a better long-term choice for horizontal decking.
  • Skipping end-grain sealing and flashing: The fastest failures happen where water sneaks in and soaks the most absorbent areas. Unsealed end cuts and missing or damaged flashing act like funnels for water. Sealing and flashing are inexpensive steps that often paid for themselves in extended service life.

When to Call a Pro in Georgia

These are not cosmetic issues but structural red flags that demand experienced eyes. A pro also knows how to read subtle failure signs that homeowners often overlook.

D&R Painting and Construction partners with trusted pros to evaluate the structure and correct fasteners, flashing, and damage before we restore the finish. When resurfacing is appropriate, we match materials and stains to your location’s specific deck weather profile for a long-lasting solution.

Protect Your Deck from Harsh Weather!

Protecting your deck from Georgia’s Weather isn’t about a single miracle product; it’s about an innovative combination of materials, detailed work, and a steady maintenance rhythm that respects our climate. When you choose a professional like D&R Painting and Construction, you get a local team that understands humidity cycles, UV intensity, coastal salt considerations, and the real-world weather for staining a deck across the state.

We start with a clean and bright surface to reset the surface, select a penetrating, UV-strong semi-transparent stain that suits your sun exposure and wood species, and set a maintenance calendar to make protecting your deck effortless. If you’re ready to refresh color, stop water intrusion, and extend the life of your outdoor space, reach out to us to schedule your consultation and get a customized plan for protecting your deck from the weather built for Georgia.

Top Exterior Paint Colors Trending in Marietta for 2025

Marietta’s tree-lined avenues showcase an eclectic mix of antebellum brick, mid-century ranch, and modern farmhouse facades. Choosing exterior hues for 2025 means balancing national design buzz with palettes that withstand Georgia’s humid summers and pollen-filled springs.

Industry forecasters, led by Sherwin-Williams’ Colormix 2025 Capsule, predict a decisive shift toward warmer neutrals layered with moody accents, tones that disguise red-clay splatter and resist the bleaching glare of June sun. This guide will provide the top exterior paint colors for Marietta’s homes in 2025 from the hands of the experts here at D&R Painting and Construction.

Learning How Palettes With Southern Brick, Craftsman, and Modern Farmhouse Styles Blend in Marietta, GA

Historic districts north of the Marietta Square tend to favor muted, mid-value neutrals paired with crisp white trim. New subdivisions off Dallas Highway lean into high-contrast siding and bold front-door statements.

2025’s forecasted colors travel effortlessly across these architectural categories, offering a flexible starting point for homeowners planning exterior house painting color schemes that feel both contemporary and quintessentially Southern.

1. Earth-Toned Neutrals for Timeless Charm

Warm taupes, soft clays, and sandy greiges headline the list of top exterior paint colors because they harmonize with common Georgia building materials, red brick, stacked-stone foundation piers, and tan concrete siding. These hues also minimize the visual impact of the orange-red clay splatter that summer storms sling onto lower courses.

Sherwin-Williams’ Foothills and Benjamin Moore’s Coastal Fog stand out as versatile bases that let architectural details, corbel brackets, dentil molding, or gable vents command attention without clashing.

A creamy warm white, such as Alabaster or Ibis White, frames windows and porch columns, throwing subtle shadows that emphasize depth even on overcast days. It stays bright enough to feel clean after pollen season.

2. Moody Mid-Dark Exteriors for Modern Sophistication

For homeowners ready to break from beige, 2025 welcomes dramatic mid-dark sidings, charcoal, iron-ore black, and deep cypress green tones that make white soffits gleam and copper fixtures glow. High-performing acrylics now embed infrared-reflective pigments, allowing darker shades to fend off solar heat gain, an essential consideration in Marietta house painting projects where attic temperatures can soar past 120°F.

A front door painted in a 60-plus LRV (Light Reflectance Value) hue, such as antique brass yellow or warm white, prevents the entry vignette from turning into a heat sponge while adding sophisticated contrast to the moody siding.

3. Coastal-Inspired Blues for a Fresh Southern Breeze

With year-round Braves fandom and summer getaways to Tybee Island, Atlantans have a soft spot for coastal color stories. 2025 breathes new life into dusty slate, misted sky, and muted denim exteriors.

Mid-tone blues soften the hard lines of fiber-cement lap siding, reflecting enough daylight to keep visual temperatures cool even when actual humidity feels oppressive. A low-luster satin on siding deflects UV without spotlighting imperfections, while a higher-sheen semi-gloss on shutters and window sashes intensifies color depth. These best exterior colors round out a tailored, coastal-meets-classic vibe.

4. Nature-Infused Greens for Eco-Friendly Curb Appeal

Sagebrush, olive, and eucalyptus hues channel the city’s proximity to Kennesaw Mountain National Battlefield Park, integrating architecture with the landscape. Greens ground homes visually, a calming quality sought after in communities juggling work-from-home lifestyles.

A matte or flat exterior coating reduces sheen glare in direct sun, making organic pigment stand out. Aged-bronze porch lights and railings add understated sophistication to residential compositions.

5. Statement-Making Terracotta and Burnt Sienna Front Doors

Nothing spells curb appeal confidence like a Mediterranean-inspired entry door. Terracotta and burnt sienna shades are bold enough to attract the eye yet earthy enough to complement Marietta’s prevalent brick.

A pop of saturated warmth animates a neutral body color, instantly communicating personal style and modernizing older façades without altering masonry. Pairing a terracotta door with a pale blue porch ceiling pays homage to regional folklore that wards off spirits while delivering a fresh take on heritage.

Accent & Trim Color Strategies for 2025 Palettes

After landing on body color, trim decisions can refine or derail the exterior story. In 2025, warm whites like Shoji White or creamy beiges like Oyster Bar edge out the stark cool whites of previous years, especially when set against brick with yellow-red undertones.

Homeowners seeking a contemporary flair may paint window sashes and gutters in deep graphite, creating eye-catching picture-frame outlines that modernize Victorian cottages without losing their historic charm. This balanced mix of light and dark ensures that exterior house painting color schemes feel cohesive rather than chaotic.

Crisp Warm Whites vs. Creamy Beiges: Choosing Based on Brick Undertone

Brick with orange notes harmonizes with balanced, warm whites, whereas cooler beige risks clashing. A quick test patch under natural morning light reveals whether the undertones dance or fight. Swapping faded almond vinyl cladding for sleek black or iron-ore aluminum sashes injects instant architectural definition, proving subtle accent tweaks can rival full-body repaints in impact.

Finishing Touches: Sheen, Durability, and Climate-Specific Coatings

Marietta’s UV index, afternoon showers, and muggy nights require products that resist chalking, blistering, and mildew. Satin finishes offer a slight gloss that sheds water and pollen more easily. Matte tops work well on rustic lap siding but may highlight Georgia clay splash if the grade lacks gutters.

High-end acrylic-latex systems include ceramic microspheres for fade resistance and mildewcides custom-blended for humid climates, maximizing the life of your chosen palette and keeping Marietta house painting intervals comfortably spaced.

Selecting a 2025 Palette That Boosts Marietta’s Curb Appeal and Resale Value

Neighborhood covenants might cap the number of primary tones or restrict overly saturated hues, but 2025’s trending palettes sit squarely within most HOA frameworks, offering updated style without rule violations. By cross-referencing color forecasts with local regulations, homeowners ensure their best exterior colors appreciate property value rather than spark compliance letters.

Choosing top exterior paint colors involves more than flipping through fan decks; it’s an investment in durability, energy efficiency, and unmistakable curb appeal. D&R Painting and Construction design consultants use digital renderings to preview your house under Marietta’s unique light, pairing professional insights with your taste to craft exterior house painting color schemes that will turn heads through 2030 and beyond. Reach out today to reserve your complimentary in-home color session and let our artisans transform trend forecasts into a flawless reality tailored to your residence.

Top 7 Tips for Deck Maintenance for Marietta Summers: Stain, Seal, or Rebuild?

Marietta’s long, sultry summers turn beautiful outdoor living spaces into year-round home extensions, yet those months punish exposed lumber more aggressively than any other season. Direct UV rays bake protective pigments, afternoon thunderstorms hammer joists with wind-driven rain, and thick blankets of yellow pollen settle into every hairline crack. The combination accelerates wood-fiber breakdown, shortens stain life, and encourages mold colonies that can become slippery under bare feet.

Understanding how Georgia’s specific climate attacks decking helps homeowners adopt proactive strategies instead of reactive repairs, saving money and weekend leisure time. On this blog, you will find seven professional deck maintenance tips from our D&R Painting and Construction experts.

Understanding How Climate Can Ruin Your Deck

Sunlight bleaches pigments and degrades lignin, the natural glue that binds wood fibers. July’s solar index in Cobb County routinely exceeds manufacturers’ levels when testing exterior coatings. Pop-up storms add sudden moisture that seeps into micro-checks. At the same time, oak and pine pollen convert any horizontal surface into a sticky film that traps moisture and mildew spores until washed away.

Most transparent and semi-transparent finishes in temperate zones carry a projected life span of two to three years. Marietta’s UV intensity and humidity can halve that estimate if maintenance lapses. Mold thrives when airborne spores land on damp, nutrient-rich surfaces like untreated deck boards dusted with pollen. Left undisturbed, colonies root into the wood grain, leading to black spots that bleach won’t entirely erase without damaging fibers.

#1: Deep Clean to Remove Pollen, Mildew, and Barbecue Grease

A spotless canvas is the first critical step in any wood deck treatment. Annual deep cleaning clears organic buildup so protective coatings adhere properly and vision-obliterating haze disappears. Select an oxygenated bleach formula rather than harsh chlorine to lift embedded stains while remaining safe for surrounding vegetation. These products activate with water, producing bubbles that break surface tension and float grime to the top without excessive scrubbing.

Maintain a pressure range between 800 and 1,200 PSI with a 25-degree nozzle and keep the wand at least twelve inches above the surface. Higher settings etch softwood, creating gouges that collect dirt faster. Composite boards tolerate slightly higher pressure, but ensure the manufacturer approves of power washing to preserve warranty terms.

#2: Inspect for Sun-Baked Cracks and Loose Fasteners

Post-cleaning inspections reveal structural issues hidden beneath dirt. Boards aligned east-west take the brunt of midday sun, expanding and contracting until small fissures emerge. Probe suspect areas with an awl; rot may be present if the tool sinks easily. Nail pops or screw lifts often signal joist movement as fasteners lose bite in shrinking wood.

Suppose a crack runs less than one-third of the board width, countersink and secure the plank with two stainless screws before sanding flush. Boards with rot or splits beyond half their width should be replaced entirely to restore deck integrity and maintain stringent safety standards.

#3: Restore Color With UV-Blocking Stains or Sealers

After repairs, protect fresh surfaces to lock out the sun and moisture. Oil-based stains penetrate deeper and excel at water repellency, making them excellent for older, drier southern yellow pine. Water-based products cure faster, emit lower odors, and resist mold better because they contain mildewcides suited for humid climates. The choice hinges on board porosity, desired dry time, and environmental regulations.

Apply coatings between 60°F and 85°F. Early morning lets you work in cool shade, ensuring even absorption before the blazing afternoon sun skims moisture from the finish, potentially trapping bubbles or causing lap marks. Never coat within 24 hours of predicted thunderstorms to allow proper curing.

#4: Protect Against Afternoon Thunderstorm Water Damage

Even fresh stain fails if water drainage remains poor. Deck boards should tilt one-eighth inch per foot away from the house. Check the slope with a four-foot level. For learning how to clean decks, verify that downspouts discharge at least five feet from footings to avoid soil erosion that may shift support posts.

If a covered space or patio exists beneath the deck, consider membrane troughs that channel water to a gutter at the rim joist. This investment shields outdoor seating and extends the usability of lower-level entertaining zones even during Marietta’s summer cloudburst.

#5: Prevent Mold and Algae With Routine Airflow and Debris Removal

Air circulation dries surface moisture and starves microorganisms. Prune limbs to create at least six feet of clearance above the deck. Increased sunlight quickens evaporation and discourages moss that often takes root in persistent shade.

Weekly sweeping of organic litter eliminates fertile ground for fungal spores. Blowers can help, but brooms are gentler on delicate stain films, preventing premature abrasion.

#6: Safeguard Hardware From Corrosion in Humid Conditions

Hidden connectors are the deck’s skeleton; rust undermines load capacity. If original hardware consists of plain steel nails, retrofit with stainless screws through-bolted where feasible. Hot-dipped galvanized joist hangers resist Georgia humidity far better than electro-galvanized counterparts.

A light annual coat of evident, exterior-grade rust inhibitor seals microscopic scratches, delaying oxidation and preserving aesthetic symmetry between wood and metal elements.

#7: Prepare for Summer Entertaining With Safety Checks

Learning how to maintain a deck is important, but structural confidence ensures gatherings remain incident-free. Apply 200 pounds of lateral force to railings, roughly the weight of an adult leaning. Any wiggle warrants re-securing with longer lag screws or replacing posts. Bounce gently on treads to detect flex; movement indicates riser or stringer deterioration.

Adhesive traction strips or sand-infused transparent coatings reduce fall risk when guests migrate from splash zones to grilling stations, satisfying both safety and comfort goals in caring for decking used by children and adults alike.

A Proactive Summer Deck Routine Extends Lifespan and Enjoyment

Marietta summers challenge decks with searing UV, humidity-fueling mold, abrasive pollen, and patio traffic invasion. Embracing a holistic maintenance strategy transforms routine chores into long-term investments. The result is a resilient outdoor stage ready for July barbecues, August sunsets, and the shoulder-season dinners that stretch alfresco living well into autumn. These deck maintenance tips preserve structural integrity, showcase natural wood luster, and safeguard family gatherings for years.

DIY diligence goes far, but expert eyes catch subtle slope misalignments and hidden rot before they become costly rebuilds. D&R Painting and Construction deck specialists offer comprehensive evaluations that include moisture readings, fastener inspections, and personalized wood deck treatment plans.

Book your complimentary assessment now, and step confidently into a summer of splinter-free, color-rich, and structurally sound outdoor living.

    What is the best exterior house paint for Georgia’s Humid Climate

    Georgia’s weather forecast reads like an obstacle course for exterior coatings. July afternoons reach heat-index readings over 100°F, August mornings blanket siding with 90 percent humidity, and spring thunderstorms can dump golf-ball hail or pull tornado-strength gusts across neighborhood rooflines.

    Cold fronts occasionally dip below freezing in winter, long enough for paint films to contract before bouncing back in the next warm spell. Suppose you want a color that looks showroom-fresh long after the warranty expires. In that case, the first question is, “What is the best exterior house paint for resisting Georgia’s subtropical extremes?”.

    Georgia’s Subtropical Swings

    Unlike arid heat, which bakes pigment, humid heat pushes moisture deep into wood grain and porous masonry. Afternoon thunderstorms slam that moisture sideways into nail heads and window flashing, testing paint’s ability to flex and seal. Coastal regions take on salt spray, and the northern foothills pile on tree pollen that embeds in sticky surfaces. Only formulations built for relentless UV, high vapor permeability, and elastic resilience can pass the Peach-State stress test.

    Ultraviolet light fades cheap pigments, leaving homes looking dull within two summers. Constant humidity feeds mildew spores unless the coating contains long-release mildewcides. Temperature swings force siding to expand and contract; without flexible binders, paint develops hairline fractures that allow water intrusion.

    Key Performance Factors to Evaluate Before You Buy

    Fade Resistance Under Intense Southern Sunlight

    Sun-soaked gables can reach surface temperatures of 150°F. High-grade acrylic resins lock pigment particles in a matrix that holds colorfast even when the sun beats for twelve hours straight.

    Pure acrylic latex binds evenly, unlike vinyl-acrylic blends that chalk faster. Look for paint lines labeled “100 % acrylic” and study their colorant technology; manufacturers now embed infrared-reflective tints that bounce heat while maintaining saturation, extending vibrancy beyond the five-year mark, a massive win for curb appeal and energy efficiency.

    Moisture & Mildew Protection During Humid Seasons

    Georgia’s humidity hovers above 70 percent for nearly half the year. Moisture creeping through paint films invites fungus that eats binders and leaves gray or black streaks.

    Premium exterior lines incorporate mildewcide packages rated for Southern exposure. After-market additives help but rarely match factory dispersion. A label promising “lifetime mildew resistance” is more than marketing fluff; it guarantees the product has undergone ASTM mildew growth tests in humidity chambers mimicking Savannah summers.

    Flexibility to Withstand Temperature Fluctuations

    Weather swings of 40°F in twenty-four hours aren’t unusual. Rigid coatings crack; flexible films stretch.

    Formulations with elastomeric properties expand up to 300 percent without losing adhesion. They bridge micro-fissures in stucco and cedar, preventing the domino effect that leads to peeling. That elasticity is key to surviving hail impact and the contraction cycles of Georgia pine siding.

    Top Paint Formulations for Georgia Homes

    1. 100 % Acrylic Latex

    Acrylic latex dominates clapboard, HardiePlank, and vinyl. It cures fast enough to dodge late-day thunderstorms and remains breathable, allowing trapped moisture to escape rather than blister.

    High breathability ratings mean water vapor can exit, while liquid rain cannot penetrate. Quick dry times, often one hour to touch and four hours to recoat, let painters beat the inevitable 3 p.m. shower, proving why acrylic remains the benchmark for exterior paint humidity tolerance.

    Elastomeric Coatings for Stucco and Masonry Exteriors

    Stucco hairline cracks from settling and hail are inevitable; elastomeric coatings stretch to cover them. Forming a waterproof membrane up to ten times thicker than standard paint, these coatings protect historic bricks in Savannah and modern stucco in Atlanta suburbs from moisture intrusion while hiding cosmetic cracking.

    UV Reflective Paints for Energy Savings

    Cool-roof technology has migrated to wall coatings. These paints keep siding cooler by reflecting infrared wavelengths, reducing conductive heat gain inside the home. Lower wall temps mean attic insulation performs better, and HVAC systems cycle less frequently, which is a tangible perk when summer power bills spike.

    Color Considerations in a High-Heat, High-UV Region

    Light Tones vs. Dark Tones: Heat Absorption and Fading Rates

    Choosing hue is about physics as much as style. Light colors reflect sunlight, staying cooler and lasting longer before fading. Dark blues and charcoal grays absorb more heat, show chalking earlier, but make a bold statement.

    Paint chips list LRV numbers; anything above 55 reflects significant light and resists heat buildup. Pair lighter field colors with darker accent shutters to balance energy performance and design flair, crafting the best exterior paint color strategy.

    Preparation and Application Tips That Maximize Paint Life

    1. Pressure Washing and pH Neutralizing Georgia Red Clay

    Red clay stains carry iron oxides that bleed through paint. Pre-washing with a mildewcide and neutralizing high pH surfaces with an acidic rinse guarantees primer adhesion.

    2. Optimal Cure Windows: Avoiding Afternoon Thunderstorms

    Spring and fall mornings between 55 °F and 85 °F with humidity below 70 percent are the best time to paint house exterior in Georgia. Aim to finish coats by early afternoon, giving paint enough skin-over time before evening dew sets.

    3. Primers That Block Tannin Bleed and Previous Color Ghosting

    Cedar tannins and dark legacy colors can seep through fresh coats unless blocked. Spot-prime knots and bare patches on otherwise sound acrylic surfaces. Full-prime chalky or oil-based remnants, ensuring uniform porosity and color holdout.

    Sustainability and Low-VOC Options for Eco-Conscious Homeowners

    Air quality rules grow stricter yearly; low VOC no longer equals low performance. Premium lines now clock under 50 g/L VOCs yet retain the same resin quality, protecting family health and the environment.

    Labels certified by Safer Choice or Greenguard signal reduced chemical emissions while meeting ASTM resistance tests, allowing eco-sensitive families to repaint confidently.

    Recommended Sheen Levels for Different Exterior Surfaces

    • Satin for Lap Siding and Fiber Cement: Satin balances washability with the ability to mask minor texture inconsistencies, which is crucial on weather-beaten clapboards.
    • Balancing Washability With Imperfection Concealment: Excess gloss magnifies flaws; satin hides them while still shedding dirt in heavy rain.
    • Semi-Gloss for Trim, Shutters, and Doors: Semi-gloss protects trim faces, hands, hoses, and ladders from scuffs and moisture.
    • Added Moisture Resistance Around Windows and Gutters: The higher resin content repels water, shielding the mitered joints where leaks start.

    Choosing the Ideal Exterior Paint for Long-Lasting Curb Appeal

    To answer the question of “What is the best exterior house paint?” you must factor application timing into your plan. Spring and fall mornings offer the best time to paint a house exterior in Georgia for quick cure and storm avoidance. With the right chemistry and prep, you’ll enjoy vibrant color, lower maintenance, and improved efficiency year after year.

    D&R Painting offers complimentary on-site evaluations that include moisture readings, substrate analysis, and digital color rendering. Our certified crews apply only region-tested coatings, ensuring your investment withstands Georgia’s most brutal summers and stormiest winters. Contact us today to discover your property’s best exterior house paint and lock in long-lasting curb appeal with zero guessing.

    How to Prepare for Interior Painting Home Projects

    Interior painting is often marketed as the quickest way to refresh a living space. Yet, seasoned pros know the visible coat is only as good as the invisible groundwork beneath it. When you set aside several disciplined hours or hire a team that does, the topcoat flows on smoother, cures harder, and resists scuffs longer.

    In practical terms, minutes invested before the first dip in the tray translate into years of extra life for every gallon you roll out. For homeowners eager to save money by painting inside or curious about how to prepare for interior painting without regrets, mastering preparation is the most powerful upgrade you can make to your DIY or contractor-led project.

    Time Saved in Preparation

    All coatings manufacturers design their warranties around ideal surface conditions. If walls are oil-free, structurally sound, and properly primed, modern latex or alkyd formulas can outlast their stated life spans by a decade. Skip the prep work; even the priciest designer paint may peel within a year, usually just outside the return window for supplies.

    Cutting corners often begins innocently, such as forgetting to wash kitchen grease, rushing to tape around electrical plates, or neglecting hairline cracks you assume will “fill themselves” with paint. Those shortcuts create micro-failures that telegraph as dull patches, roller ridges, or dark stains through the finish. They are also slow painters because touch-ups always take longer than doing right the first time.

    D&R Painting has rescued enough weekend projects to confirm that efficiency starts with preparation for “how to paint a house interior”.

    Step 1: Evaluate Walls, Trim, and Ceilings for Repairs

    The first walkthrough should mimic a home inspection. Hold a bright work light at a shallow angle to the surface and note every imperfection. Look for popped drywall screws, shrinking caulk seams, or subtle water rings near vent boots.

    Early detection lets you choose repair materials, such as lightweight spackle for nail holes, setting-type joint compound for cracked corners, or shellac-based primer for nicotine stains, before paint shopping distracts you.

    Spotting Cracks, Nail Pops, and Water Stains Early

    Vertical stress cracks typically appear over framing joints; nail pops protrude as circular mounds. Water stains often lurk near ceiling fixtures or HVAC registers. Mark each flaw with painter’s tape so nothing hides beneath the excitement of color swatches.

    Use vinyl spackle for hairline blemishes because it sands feather-smooth. If cracks exceed one-eighth inch, embed paper tape in the joint compound to prevent re-opening. For stains, opt for an oil or shellac primer that locks in tannins and rust, guaranteeing your final hue stays true.

    Step 2: Clear and Protect Your Space

    Paint drips respect no heirloom. Before a single tarp unfolds, plan traffic flow, tool staging, and safe zones for pets or toddlers. In smaller rooms, remove furniture entirely. Where square footage is tight, consolidate pieces in the center and wrap them under six-mil poly sheeting, sealing seams with painter’s tape to stop airborne dust.

    Moving items out grants 360-degree access and lowers accidental contact. Center-stacking saves time but requires vigilant wrapping and adds extra steps when repositioning ladders. Weigh labor versus risk; professional crews like D&R Painting often blend both tactics, removing delicate décor but stacking durable couches.

    Step 3: Clean Surfaces for Optimal Paint Adhesion

    Grease, dust, and hand oils sabotage bonding. Begin with a mild dish soap solution on general walls, progressing to commercial degreasers where stovetop vapor collects. Rinse thoroughly; detergent residue can inhibit curing just as effectively as dirt.

    Once the walls dry, drag a microfiber tack cloth across the surface to pick up residual dust. Vacuum baseboard crevices with a brush attachment to prevent loose particles from spoiling wet paint. This meticulous approach embodies how to prepare for interior painting like a pro.

    Step 4: Mask, Tape, and Detail Critical Edges

    Crisp lines elevate amateur work to showroom quality. Choose the painter’s tape width based on surface variance: wider tape bridges textured gaps around the brick and uneven molding; narrow widths suffice for smooth trim.

    Blue or green low-tack tapes resist bleed-through yet pull cleanly. Firmly burnish edges with a five-in-one tool to seal fibers against seepage, especially when using low-VOC paints that set faster. After rolling up the tape line, lightly drag a dry, angled sash brush along the edge. The motion wicks away excess paint, preventing ridge build-up and producing crisp transitions worthy of architectural photography.

    Step 5: Sanding and De-Glossing Existing Finishes

    Glossy surfaces resist adhesion. A quick scuff with 120-grit breaks the sheen; a finishing pass with 220-grit refines the tooth for silky topcoats. Always sand in the direction of the grain on the wood trim to avoid swirl marks. Use coarser grit on oil-based enamels found in older homes, then finesse with finer grit. On latex walls, a single 180-grit pass might suffice. Wipe dust after each sanding session, reinforcing the dust-removal step.

    For crown molding or ornate wainscoting, liquid de-glosser saves fingers. Apply with a lint-free cloth, wait ten minutes, and you’re ready for primer, no dust, no detail sanding, and maximum time efficiency.

    Step 6: Priming for Color Accuracy and Stain Blocking

    Primer isn’t just insurance; it’s a performance enhancer. A high-hide white creates a neutral canvas on dark walls destined for pastel makeovers, so the new color appears exactly as it did in the store light. Adhesion primers grip melamine, Formica, or varnished wood, allowing latex topcoats to adhere without peeling. They also contain stain blockers that neutralize knots or water rings sealed earlier.

    When transitioning to deep blues or reds, request fifty-percent tinting of your primer. The mid-tone base reduces the number of finish coats needed, saving labor and material costs. It is a favorite painting hack among budget-smart homeowners exploring interior painting tips.

    Step 7: Setting Up an Efficient Painting Workflow

    An orderly plan reduces lap marks and color inconsistencies. Seasoned crews first paint ceilings to prevent spatter on newly finished walls, cut corners, roll larger expanses, and finally address trim and doors. Maintaining this order ensures any minor drips flow onto yet-to-be-painted areas, not freshly dried surfaces. It also permits logical drying periods between stages, speeding up the overall project.

    Maintaining a Wet Edge With Proper Roller Nap Selection

    Use a half-inch nap on textured drywall to hold enough paint for smooth coverage without oversaturation. Work in overlapping “W” strokes within a manageable six-foot square, always rolling back into the leading wet edge. Continuous wet-edge technique eliminates banding, the tell-tale sign of erratic DIY progress.

    Prep Smarter, Paint Better, Enjoy Longer-Lasting Results

    Preparation spells the difference between a finish that gleams for fifteen years and one that dulls after a single heating season. By inspecting and repairing surfaces early, safeguarding valuables, degreasing thoroughly, mastering masking, sanding for adhesion, priming for uniformity, and establishing an efficient workflow, you lay the groundwork for impeccable results.

    These steps embody everything professionals mean when discussing how to prepare for interior painting and elevate any project from routine maintenance to a value-adding upgrade.

    Schedule a Professional Prep Consultation Before You Open the Paint Can

    If the process sounds meticulous, excellence lives in the details. D&R Painting specializes in preparation as much as color, offering complimentary in-home consultations to evaluate repairs, moisture concerns, and optimal coatings. Before you lift a brush or purchase drop cloths, let our experts tailor a plan that combines industry best practices with your design goals. Reach out today and discover how efficient prep can transform painting inside from a weekend gamble into a guaranteed investment in home beauty.

    Guide to Interior Painting Projects for Your House Before Selling in Marietta, GA

    When listings flood the Cobb County MLS each spring, homes that feel bright, clean, and move‑in ready vault to the top of every buyer’s shortlist. Nothing telegraphs “well‑maintained” more convincingly than crisp, updated walls. A carefully planned coat of paint helps photos pop on, masks everyday wear, and invites offers that meet, or exceed, the asking price. Planning interior painting projects for your house, timing and technique matter as much as color choice, and this guide explains how D&R Painting & Construction can help you achieve both.

    Why Fresh Paint Sells Faster in Marietta’s Competitive Market

    Savvy agents agree that buyers form opinions within seconds of crossing the threshold. Soft, neutral palettes feel larger, calmer, and cleaner than bold or dated hues, nudging prospects to picture their furniture in the space.

    Marietta’s mix of young professionals, growing families, and downsizing retirees favors warm beige living rooms, creamy white trim, and serene blue-gray bedrooms; tones that complement the region’s abundant natural light and varied architectural styles.

    Steps for a Successful Home Interior Painting Project

    Step 1: Evaluate Your Current Interior Condition

    Before you pick up a brush, walk every room like a home inspector. Note nail pops, fingerprint smudges, water stains, and faded accent walls that can be a to‑do list for buyers.

    Pay special attention to high‑traffic corridors where fingerprints darken doorjambs and children’s rooms decorated in primary colors that limit universal appeal. Shine a flashlight across surfaces to reveal drywall dings, check baseboards for pet scratches, and glance up for ceiling hairline cracks. Document everything so your estimate covers materials, prep time, and any minor repairs needed before you paint a house interior.

    Step 2: Choose Buyer‑Friendly Paint Colors

    Color is marketing. The goal is not personal expression but broad appeal that photographs well under natural and LED lighting.

    Paint manufacturers’ best-selling colors bounce soft, golden sunlight through open concept floor plans and balance north-facing rooms that skew cool. Employ warm taupes in expansive living areas to create intimacy, while cooler grays enlarge smaller bedrooms. Like artwork, using semi‑gloss white on trim frames on each wall is a subtle painting design trick that buyers subconsciously notice.

    Step 3: Prioritize High‑ROI Rooms

    Some spaces influence the sale price more than others; allocate your budget accordingly. These headline rooms dominate online photo carousels, open‑house traffic flow, and appraisal evaluations. Fresh, neutral walls help buyers focus on square footage and layout rather than calculating future weekend projects.

    The Virtual Tour 3D Effect: Highlighting Spaces Buyers Zoom In On

    Because 3‑D walkthroughs allow viewers to scrutinize trim seams and corner lines, professional finishes in these rooms build confidence that hidden systems, plumbing, electrical, and HVAC are equally well cared for.

    Step 4: Prep Like a Pro for Flawless Results

    Ask any seasoned painter for the best way to paint a room, and they will tell you to prepare. Degrease kitchen walls, fill nail holes with lightweight spackle, sand rough patches, and vacuum dust before primer touches the surface. Skipping these steps guarantees an uneven sheen that cheapens the final product.

    Modern stain-blocking primers seal odors and dry in under an hour, allowing same-day color coats and eliminating lingering paint smells during showings. D&R Painting & Construction stocks low-VOC products that are ideal for tight listing timelines.

    Step 5: Select the Right Finish for Each Surface

    Sheen affects durability, touch-up ease, and glare, influencing buyers’ perception. Use washable matte or eggshell in living areas to hide minor drywall imperfections, satin in bathrooms for moisture resistance, and semi‑gloss on trim for crisp contrast.

    Hallways benefit from scrubbable satin that shrugs off suitcase scuffs, while children’s bedrooms may favor touch-friendly matte that disguises future patch jobs. Matching finish to function ensures your guide painting strategy holds up through inspection and move-in day.

    Step 6: Decide Between DIY and a Professional Painter

    Budget and timeline drive this decision, but don’t underestimate the value of professional craftsmanship. DIY savings can vanish if busy schedules stretch the project for weeks, delaying listing dates. Mis‑cut lines or paint spatters may also require costly corrections. Verify liability coverage, workers’ comp, and recent five‑star testimonials. D&R Painting & Construction, BBB accreditation, and color consultation service streamline your prep list while protecting your investment.

    Pro Tip for Making a Good Photo of Your Home

    Even perfect walls need strategic styling to convert curiosity into offers. Layer ambient and task lighting to avoid shadows, pull furniture six inches from walls to show off square footage, and add greenery that draws the eye toward the paint’s undertones. Shoot during golden hour for balanced color, use a wide‑angle lens sparingly to avoid distortion, and highlight crisp baseboard lines to reinforce workmanship quality.

    Common Mistakes to Avoid When Painting Before a Sale

    Overly Bold Colors, Skipping Primer, and Rushing Dry Times

    Vivid accent walls may alienate buyers, while bypassing primer leads to bleed‑through that stresses inspectors. Re‑coating too soon causes drips and roller marks visible under staging spotlights.

    How These Errors Can Lower Appraisal Values and Extend Days on Market

    Appraisers note cosmetic defects, flagging them as deferred maintenance that chips at valuation. More extended listing periods often translate into price reductions that are far more expensive than a well‑executed paint job.

    Boost Curb to Closing Appeal With a Strategic Interior Paint Refresh

    Thoughtfully executed interior painting projects for your house unlock immediate buyer interest, higher appraisals, and faster closings. Neutral palettes, meticulous prep, and room‑specific finishes create a turnkey impression that resonates in today’s data‑driven real‑estate searches.

    Are you ready to transform walls into your strongest sales asset? Contact D&R Painting & Construction for a complimentary in-home color consultation and discover how our licensed crew turns every brushstroke into measurable equity. Put our local expertise to work, and watch potential buyers fall in love the moment they step through your freshly painted door.

    Top 5 Most Popular Signs You Need a House Repaint in Summer

    The Southeast’s long, bright days and predictable weather windows make summer prime season for refreshing tired facades. This season brings the most popular signs that you need a house repaint in summer. As a result of outside painting temperature, color stays richer, adhesion lasts longer, and projects wrap up faster, which is a critical benefit for homeowners who want curb appeal without an endless construction zone.

    Why Summer Is the Best Time for Exterior Painting

    • Optimal Temperature and Humidity for Paint Curing: Most leading manufacturers rate 50°F to 90°F and relative humidity below 85 percent as ideal for application. Summer days hover comfortably around 80°F with moderate moisture, allowing each coat to set evenly instead of flashing dry on the surface while trapping moisture underneath. The result is a smoother texture, a stronger bond, and a finish that shrugs off afternoon thunderstorms.
    • How Longer Daylight Hours Speed Up Project Timelines: Extended light permits earlier starts, shorter dry‑time intervals, and a complete second coat before dusk. With twelve to fourteen workday hours, the crew at D&R Painting can prep, prime, and color in one continuous flow, reducing labor days and minimizing disruption. For homeowners weighing a house repaint in summer, time is money, and summer’s clock puts both on your side.

    1. Fading or Sun‑Bleached Paint

    Nothing announces an aging exterior like chalky siding that once boasted vibrant color. Continuous solar exposure gradually breaks down pigment particles, causing dull patches and uneven tones, especially on west and south-facing elevations. Ultraviolet radiation penetrates the topcoat, oxidizing binders and lifting volatile components to the surface as powdery residue. Over months, protective resins erode, exposing underlying layers to temperature swings and rainwater infiltration, accelerating decay.

    Run a damp cloth across the siding. If a dusty film transfers, that’s pigment erosion. Compare the paint behind a wall‑mounted address plaque to the exposed area around it; any obvious contrast signals it’s time for new summer house paint colors designed with UV‑blocking additives. Early intervention avoids deeper substrate repairs and immediately elevates curb appeal.

    2. Peeling, Cracking, or Bubbling Surfaces

    When paint no longer forms a continuous barrier, water penetrates tiny fissures, swells wood fibers, and forces coatings to lift, a domino effect that worsens with each afternoon shower.

    Improper surface prep, low‑quality primers, or painting outside recommended temperature ranges can prevent proper bonding. Moisture then wicks through nail holes or improperly caulked joints. As water vapor expands under the paint film, blisters and flakes appear. Slide a plastic card beneath a curled edge. If it slides freely under a large section, adhesion has failed. Attempting spot fixes in summer humidity rarely succeeds; complete removal and a fresh system are essential.

    A professional summer house painting crew will power wash, scrape, and sand to bare wood before applying breathable primer that locks out moisture while letting residual vapor escape.

    3. Visible Wood Rot or Exposed Bare Spots

    Bare wood invites fungi, termites, and carpenter bees. Left unchecked, they compromise structural integrity and trigger expensive siding or framing replacements. Paint functions like armor plating, shielding cellulose fibers from relentless wet and dry cycles. Once that membrane breaks, boards absorb water, swell, and crack. Warm summer weather then fuels microbial growth, and the cycle of deterioration spins faster.

    Probe the suspect trim with a screwdriver. Soft penetration indicates rot. Replacing small sections and sealing them with premium house paint in summer stabilizes the envelope and avoids mismatched patch jobs, devaluing your property. D&R Painting & Construction’s carpentry team swaps compromised boards on the same visit, ensuring a seamless surface for primers and finish coats.

    4. Mold, Mildew, or Dark Streaks on Siding

    Black or green streaks at eaves and shaded walls may look like dirt, but they’re usually spore colonies thriving on chalky, moisture-laden paint films.

    Mildew feels slimy when damp and powders off when dry; dirt rinses easily. A simple bleach‑water dab that turns the stain light tan confirms fungal presence. Persistent colonies suggest that your coating’s mildewcide is exhausted, and surface porosity invites moisture. Pressure washing with biocide detergents eradicates spores, but long‑term protection comes from repainting with formulations fortified against biological attack. Choosing mid-sheen summer house paint colors also helps, as smoother surfaces shed dew faster than matte finishes, depriving spores of moisture.

    5. Outdated or Faded Color Hurting Curb Appeal

    Even structurally sound paint can sabotage resale potential if the palette screams 2010. Today’s buyers scout neighborhoods brimming with sophisticated neutrals and high contrast trim. Warm whites paired with charcoal shutters, dusky blues trimmed in crisp ivory, or earthy greens accented with bronze hardware dominate Marietta’s latest home design magazines. Updating to these tones signals meticulous upkeep and contemporary taste.

    Advances in infrared reflective pigments keep darker colors cooler, extending longevity and reducing attic heat gain. Consult D&R Painting & Construction’s color advisor to select shades that harmonize with roof shingles, masonry, and landscaping, all while maximizing energy efficiency during sweltering months.

    Additional Changes

    While these five warning signs cover the most common triggers for a summer repaint, savvy homeowners take the opportunity to evaluate functional upgrades at the same time. When you schedule your house repaint in summer, ask your estimator about modern elastomeric caulks that stretch with seasonal expansion, high‑build primers that smooth minor siding imperfections, and eco‑friendly coatings engineered to outperform traditional alkyds in elevated humidity. Bundling minor carpentry fixes, such as swapping split corner boards, tightening loose soffits, or installing stainless fasteners, into the same work order creates economies of scale. It can shave hundreds off total labor costs.

    D&R Painting & Construction also offers flexible staging options. The sun‑baked elevations are completed each morning, and crews are shifted into the shade by midday. This ensures that every gallon cures within the ideal outside painting temperature window for maximum durability.

    Schedule Your Summer Repaint Before Peak Heat

    A strategic house repaint in summer safeguards your investment, enhances curb appeal, and leverages perfect curing conditions. Watch for fading, peeling, bare wood, mildew, and dated tones. Address them promptly with professional prep, premium products suited to ideal outside painting temperature ranges, and a designer’s eye for summer house paint colors.

    Summer’s calendar fills quickly. Contact D&R Painting & Construction now for a complimentary consultation and discover how our certified team transforms aging exteriors into head‑turning showcases. Secure your place on our schedule before peak heat arrives, and enjoy worry‑free protection, vibrant color, and boosted property value all season long.